
How to Build a Fire Pit in Your Backyard
A calm, step-by-step walkthrough for turning a patch of lawn into the spot everyone drifts toward after dinner: safe, sturdy, and genuinely buildable in a weekend.
- Time: one weekend
- Skill level: beginner-friendly
- Steps: 7
- Heavy lifting: yes, bring a friend
The Short Answer
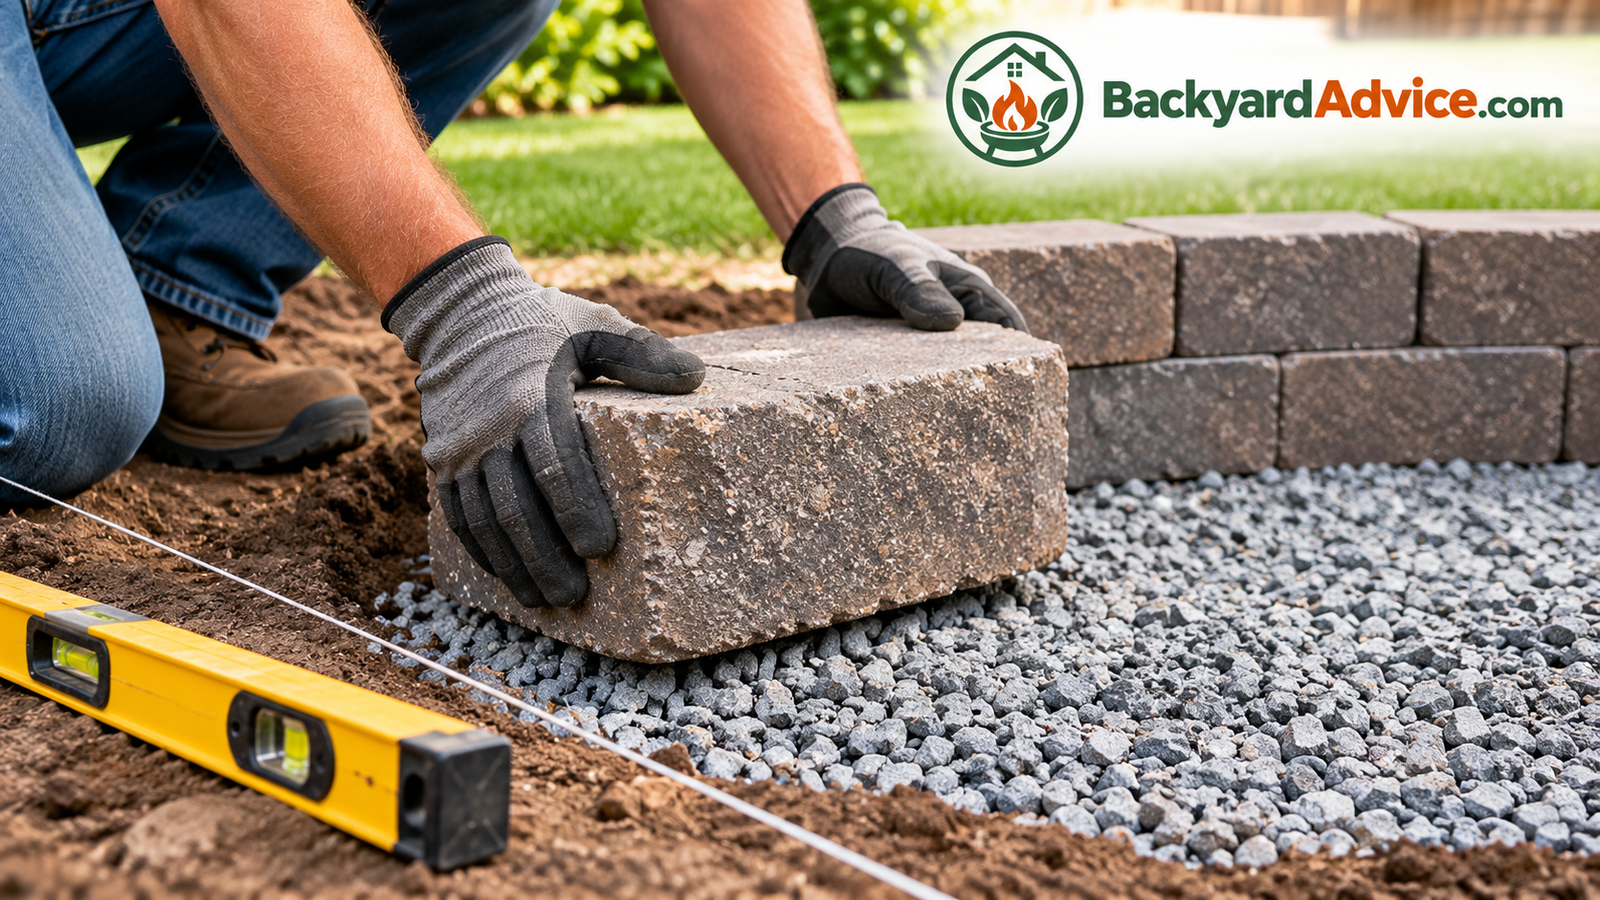
To build a fire pit in your backyard, confirm your local rules, choose a level spot well clear of the house, fences, and overhanging branches, mark a circle about three to four feet across, dig six to eight inches down, pack in a layer of compacted gravel, stack two to three courses of fire-safe blocks with outdoor adhesive, drop in a steel ring or firebrick liner, and finish with fire-safe fill and comfortable seating.
There is something about an open fire that makes a backyard feel twice as big. People talk longer. Kids stay outside past the point where they would normally drift back toward screens. Someone always has a marshmallow situation going wrong in the best possible way. And the good news is that you do not need a landscaping crew or a four-figure budget to get there. A solid, good-looking fire pit is one of the most approachable hardscape projects a homeowner can take on, because the whole thing is really just a circle of stacked blocks sitting on a well-prepared base.
What separates a fire pit that lasts for decades from one that cracks, tilts, or becomes a safety headache is almost entirely the prep work. The digging, the gravel, the leveling, the choice of materials: that is where the quality lives. The fun part, stacking blocks and watching a wall appear, is the shortest stretch of the job. This guide spends its time on the parts that matter, with a hand-drawn diagram for every step so you can see exactly what we mean instead of guessing.
We will walk through the rules and safety basics first, because nothing ruins a project faster than a neighbor, a burn ban, or a surprise utility line. Then we will compare the main fire pit types, pick the right location, gather materials, and build the pit in seven clear steps. After that comes the stuff nobody tells you about: how to care for the pit, how to burn wood properly, and what to do when something looks off. Grab a coffee, and let us get into it.
1. Check the Rules and Safety Basics Before You Dig
The least glamorous part of any fire pit project is also the one that can save you the most grief. Before you buy a single block, spend an hour figuring out what your city, county, and homeowners association actually allow. Rules vary wildly. Some places treat a backyard fire pit like a grill, some require a permit, and some limit what fuel you can burn or how large the pit can be. A few areas ban open wood fires entirely during dry seasons, even for pits that are perfectly built.
If you are not sure where your property falls, our guide on whether you can have a fire pit in your backyard breaks down the common restrictions, from setback distances to burn bans, and shows you where to look for the official answer. It is worth reading before you commit to a design, since local rules sometimes decide the type of pit you can build.
Questions to Answer First
- Is a wood-burning fire pit allowed at all? Some neighborhoods allow gas only.
- Is a permit required? Call the local fire department or check the municipal website.
- What is the minimum distance from structures? Many places require at least ten to twenty-five feet from the house, deck, fence, shed, and property line.
- Does your HOA have design rules? Some limit height, materials, or visibility from the street.
- Are there seasonal burn bans? These can apply even to pits that meet every other rule.
Call Before You Dig
Buried gas, electric, water, and internet lines run through more yards than people realize. In the United States, calling 811 a few days ahead of digging gets utility companies to mark underground lines for free. Elsewhere, your local utility locating service does the same job. A fire pit is a shallow dig, but shallow is exactly where many service lines sit. This one phone call is not optional, and it is far cheaper than repairing a severed line.
Build the Safety Kit Now, Not Later
Set up your safety gear while the project is still on paper. A fire pit is not dangerous when it is built and used sensibly, but it is not a toy either. You want a water source within easy reach, such as a garden hose with a working nozzle that stretches to the pit, plus a bucket of sand or a rated outdoor fire extinguisher nearby. Keep a pair of heat-resistant gloves and a long poker or fire tool with the pit, and decide in advance who is responsible for watching the fire whenever it is lit.
Finally, think about the people who share your yard. If young children or pets will be around, a wider wall, a spark screen, and a clear “no-go” zone around the pit make everyone safer. If your neighbors have smoke-sensitive family members, a heads-up and a bit of consideration about wind direction keeps the peace. Fire pits are social by design, and that includes the folks next door.
2. Choosing the Right Type of Fire Pit for Your Yard
“Fire pit” covers a surprising amount of ground. Before you start digging, it helps to know what you are actually building and how it stacks up against the alternatives. The right choice depends on your budget, how permanent you want the pit to be, how much fire you want to manage, and how much work you are willing to do.
| Type | Best For | Effort | Main Upside | Main Downside |
|---|---|---|---|---|
| Portable steel bowl | Renters, small patios, flexible setups | Very low | No digging, easy to store | Thin metal can warp over time |
| In-ground pit | Casual, low-profile gatherings | Moderate | Blends into the yard, wind-protected | Drainage and cleanup are tricky |
| Block or stone wall pit (this guide) | Permanent, sturdy, customizable seating areas | Moderate | Long-lasting and great-looking | Heavy materials, requires prep work |
| Brick pit with firebrick liner | Traditional look, high heat tolerance | Moderate to high | Handles heat very well | More cutting and fitting |
| Gas fire pit or fire table | Clean, switch-on convenience | High (needs gas line) | No smoke, no cleanup | Professional install, less crackle |
| Chiminea | Patios, smaller spaces | Low | Directs smoke upward | Smaller fire, less social |
This guide focuses on the classic block-and-ring pit: a circular wall of stacked blocks with a steel ring or firebrick liner inside, resting on a compacted gravel base. It is the sweet spot for most homeowners. It is permanent without being extravagant, it looks good from day one, and every skill involved is learnable in an afternoon. If you would rather skip the build and buy something ready-made, our roundup of the best fire pit for your backyard compares finished models in a range of sizes and styles.
Wood-Burning vs. Gas
This is the biggest fork in the road, and it is worth thinking through honestly. A wood fire has the smell, the crackle, and the satisfying ritual of building and tending it. Gas gives you flames at the turn of a knob with no ash, no smoke, and very little risk of flying embers. Here is how they compare.
Wood-Burning Pros
- Real crackle, scent, and ambiance
- Lower upfront cost
- Doubles as a cooking fire
- No gas line needed
Wood-Burning Cons
- Smoke and ash to manage
- Restricted by burn bans
- Needs constant attention
- Firewood costs and storage
Gas Pros
- Instant on and off
- Smokeless and cleaner
- Often allowed during burn bans
- Easier to control
Gas Cons
- Professional installation
- Higher cost overall
- Less heat and ambiance
- Cannot cook over it the same way
How Big Should It Be?
Size is mostly about comfort and safety. A typical backyard pit has an interior diameter of about thirty-six to forty-four inches, which is large enough for a satisfying fire and small enough that everyone can lean in and feel the warmth. Go too big and you will burn through wood and struggle to keep the whole group warm. Go too small and logs hang over the edge, which is a safety problem. For most families, a thirty-six to forty-two inch interior hits the balance well, and that is the size the diagrams below assume.
Height matters too. Most builders stop at twelve to fourteen inches above ground, which suits sitting around the fire in standard chairs. If you want people to perch on the wall itself, you might go a little higher and add a smooth cap, but keep in mind that a taller wall makes the fire harder to see from low seats.
3. Picking the Perfect Spot (and Measuring It Properly)
Where you put the fire pit shapes how often you will actually use it. A pit stuck in a far corner can feel lonely, while one pushed too close to the house feels cramped and carries real risk. Aim for a spot that feels connected to the rest of the yard but gives the fire plenty of breathing room.
The Clearance Checklist
Start with the hard limits, because they narrow your options fast. Your local rules may specify a distance, but as a general sense of scale, plan for at least ten to twenty-five feet from your house, deck, shed, and fence, and keep a generous gap from the property line. Overhead is just as important as the sides: look up. Low tree branches, pergola beams, power lines, and awnings all create hazards, and a fire pit should have open sky above it with no overhang for at least ten feet or so.
- Horizontal clearance: keep well away from siding, wood decks, fences, hedges, and anything flammable.
- Vertical clearance: no branches, roof edges, or string lights directly overhead.
- Ground surface: choose level ground with good drainage, ideally not at the bottom of a slope where water pools.
- Distance from play areas: keep swing sets, trampolines, and plastic play gear well back.
Think About Wind and Smoke
Spend an evening noticing which way the breeze usually blows in your yard. Smoke follows seating, so you want the prevailing wind to carry it away from where people will sit and away from your neighbors’ windows. If your property is open and gusty, a slightly sheltered location, such as the lee side of a hedge at a safe distance, helps keep embers under control. It also makes the fire easier to enjoy, since a steady flame behaves better than one fighting a crosswind.
Plan the Seating Zone in Advance
It is easy to design the pit and forget the people. Sketch a rough circle around the pit that extends at least seven to ten feet out in every direction. Inside that zone you will want space for chairs, walking paths, and a firewood stack, with enough room that people can slide past each other without brushing against hot stone. Leaving a clear path to the house or patio also makes carrying food and drinks safer after dark.
Consider the view, too. A fire pit in the center of the lawn is lovely for stargazing, while one tucked near a garden bed frames the flames with greenery. If you are planning to string lights across the area, think about the poles or anchor points now so you are not working around the finished pit later. Our walkthrough on how to string lights across your backyard shows how to hang them safely, and you can use it to plan anchors before the dig even starts.
Test the Spot Before Committing
Here is a simple trick: set out four chairs where you imagine your seating, put a folded towel or a bucket where the pit will go, and spend an evening using the space. Notice where the sun sets, where the wind pushes, and whether the spot feels inviting after dark. Five minutes of testing can reveal problems that no measuring tape will ever show you.
4. Materials and Tools: What to Buy Before You Start
The best fire pit builds are the ones where nobody makes a mid-project hardware store run with half-wet concrete on their hands. Gather everything ahead of time, lay it out in the driveway, and double-check quantities. Most of the weight comes from blocks and gravel, so plan how they will be delivered and moved. A wheelbarrow earns its keep on this project.
Choosing the Right Blocks
The most common choice for a DIY pit is the standard retaining wall block. These are cast concrete units with a lip or pin system, designed to stack tightly and stay put. They come in many colors and textures, and they are widely sold at home centers. Natural stone is beautiful but harder to work with, and standard brick is fine for the outer wall as long as you protect it with a liner. Whatever you choose, look for blocks designed for outdoor structural use.
Why You Need a Liner
Ordinary concrete block will not love direct, repeated high heat. Over time it can crack, spall, or crumble. That is why most proven designs add an inner layer, either a steel fire ring that sits inside the wall or a ring of firebrick, which is made specifically to tolerate intense heat. The liner takes the beating while the outer blocks stay decorative and cool enough to sit near. For a first build, a steel ring insert is the easiest option, since it comes ready-made in common diameters and drops right in.
Full Shopping List
| Item | What It Does | Rough Quantity |
|---|---|---|
| Retaining wall blocks | Form the outer wall | About 10 to 14 per course, two to three courses |
| Paver base or crushed gravel | Drainage and stable foundation | Roughly a half cubic yard or less for a standard pit |
| Steel fire ring insert or firebrick | Protects walls from direct heat | One ring, or enough firebrick to line the interior |
| Outdoor masonry adhesive | Locks courses together | A few tubes, depending on block size |
| Fire-safe fill (lava rock or similar) | Lines the pit floor | A few bags |
| Marking paint, stakes, and string | Lay out the circle | One set |
| Landscape fabric (optional) | Helps keep gravel and soil separated | One small roll |
Tools You Will Need
- Round-point shovel and a flat spade
- Wheelbarrow for hauling gravel and blocks
- Hand tamper or plate compactor rental
- Four-foot level and a smaller torpedo level
- Rubber mallet
- Caulk gun for adhesive
- Tape measure, string, and a center stake
- Work gloves, safety glasses, and sturdy boots
- Masonry chisel or brick hammer for trimming blocks, if needed
A quick note on cost: this is a flexible project. A modest build with standard blocks and a basic steel ring tends to land in the low hundreds of dollars, while natural stone, custom caps, and fancy fill can push it considerably higher. Block weight is where people underestimate the effort, since each unit can weigh thirty to fifty pounds. Plan on lifting with your legs, working in pairs when you can, and taking breaks.
5. Mark the Layout With a Stake, String, and Paint
Now the fun begins. Everything about the finished pit depends on getting a clean, accurate circle on the ground, and the easiest way to make one is the same trick used by landscapers and pizza-makers alike: a center point, a piece of string, and something to mark with. You do not need any special skills here, just a bit of patience and a willingness to measure twice.
Start by deciding your interior diameter. If you are using a steel fire ring, the ring itself sets that number, with thirty-six inches being a very common size. Next, find the depth of your wall blocks. Standard retaining wall blocks often run around eight inches front to back, though yours may differ, so check the label or measure one. Your outer circle is the interior diameter plus twice the block depth. For example, a thirty-six inch ring with eight-inch blocks gives you an outer diameter of fifty-two inches, which means an outer radius of twenty-six inches.
How to Draw the Circle
- Drive a stake or screwdriver into the ground at the exact center of your chosen spot.
- Tie a piece of string to it, then tie the other end around a can of marking paint, measured to the outer radius.
- Keep the string tight and walk the paint can around the stake, spraying a steady line to make the outer circle.
- Shorten the string to the inner radius and repeat for the inner circle, if you want a visual guide for the fire area.
The stake sits at the center, and the string swings the outer and inner circles.
Check It Before You Dig
Step back and look at the circle from where people will sit and from the house. Does it feel centered in the space? Does the paint line look smooth and round? Compare the center-to-edge distance at four points around the circle, like the points of a compass. If they match, your circle is true. If you are building near a slope, mark the high and low side now, because that will determine how much digging you do on each side later.
Also take a moment to remove anything that might be in the way, such as garden edging, stray rocks, or low plants. Mark the spot where you will park your wheelbarrow and stage your blocks so you are not trampling the work zone. These small pieces of planning keep the dig smooth and the finished pit tidy.
6. Dig the Pit and Prepare the Ground
With your circle marked, it is time to remove the grass and soil. Digging is the most physical stage of the build, so take your time, wear gloves, and pace yourself. The goal is a flat-bottomed, circular hole that gives the gravel base and first course of blocks a firm, level place to rest.
Begin by cutting the sod. Use a flat spade to slice along the outer circle, then slide the blade under the turf and peel it away in sections. Save it if you want to patch bare spots later, or add it to a compost pile. Once the sod is gone, begin removing soil from the center outward, aiming for a depth of roughly six to eight inches below the surrounding grade. In areas with deep frost, going a bit deeper and adding more gravel helps the base resist heaving, which is the up-and-down movement caused by freezing and thawing.
A side view of the pit: flat bottom, straight sides, and room to work.
Keep the Bottom Level and the Sides Straight
As you dig, check the bottom frequently. Lay a straight board across the pit and set your level on it. Rock the board in different directions, looking for high spots to shave off and low spots to fill. Resist the urge to backfill with loose dirt, because loose soil settles over time and drags your blocks down with it. If you overdig, fill the low area with gravel and compact it instead. Firm, undisturbed subsoil is the best foundation you can ask for.
Keep the sides of the pit as vertical as practical, and extend the dig a few inches past the outer circle so you have room for your hands, a tamper, and a level. This working room feels like wasted effort until the moment you are trying to set the first block and realize you cannot reach the back edge.
Think About Drainage
Rain is the quiet enemy of any fire pit. If water sits in the base, it softens the soil, freezes in cold weather, and stresses the blocks. If your yard has heavy clay or tends to puddle, dig a little deeper and plan a thicker gravel layer. In extreme cases, a small drain channel sloping away from the pit down to a lower part of the yard works wonders. A lot of cracked fire pits trace back to poor drainage, so a few extra minutes of thought here pay dividends for years.
Pile your excavated soil on a tarp, which makes cleanup easy, and consider using it to build up a gentle berm elsewhere in the yard or to fill low patches. If you hit a root thicker than a thumb, cut it cleanly with loppers and keep going. If you hit something that is clearly not a root, such as a pipe, cable, or tape marker, stop immediately and reassess.
7. Build and Compact the Gravel Base
If there is one stage you should never rush, this is it. The gravel base is the unseen hero of your fire pit. It drains water away, stops the soil from shifting, and gives your first course of blocks a flat, stable surface. A pit built on a well-compacted base stays level for a decade or more, while one built on loose dirt may tilt within a single season.
Use crushed gravel or paver base, which contains a mix of stone sizes that lock together when compacted. Avoid smooth pea gravel, since the round stones roll around and never settle into a solid layer. If you want extra protection against weeds and soil mixing into the gravel, lay landscape fabric across the bottom of the pit first and let it run up the sides a little.
Add gravel in thin layers and tamp each one before adding the next.
The Layer-by-Layer Method
- Pour in about two inches of gravel and rake it roughly level.
- Tamp the entire surface firmly, working from the edges toward the center.
- Repeat with another thin layer until you reach a compacted depth of four to six inches.
- Lay your level on a straight board and check the surface in several directions.
- Add or scrape gravel as needed until the bubble sits right in the middle.
Compacting in thin layers matters more than most people expect. A thick layer only compacts on top, leaving soft pockets underneath that settle later. A hand tamper works fine for a pit this size, though renting a small plate compactor can save your shoulders. Wetting the gravel lightly with a hose as you tamp helps the stones lock together, but avoid creating mud.
Leveling Details That Make the Difference
The base does not need to be perfect to the millimeter, but it should be flat to within a quarter inch across the whole circle. A great technique is to set a straight pipe or two-by-four on top of the gravel and drag a flat board across it, screeding the surface smooth. Once you are satisfied, give it a final pass with the tamper and take one last level reading in four directions. If you are unsure whether it is level enough, it probably needs another pass.
Remember to leave a little room to bury the bottom edge of the first block. The goal is for the first course to sit firmly on the gravel with its top edge a couple of inches above the surrounding grade, so the pit looks like it is rising out of the ground rather than sitting on top of it.
8. Set the First Course of Blocks
The first course is the one that controls everything above it. If this ring of blocks is level, tight, and round, every course after it falls into place. If it is wobbly or uneven, every course after it amplifies the problem. Spend more time here than seems reasonable, and the rest of the build will feel almost easy.
Start by dry-fitting the entire ring without any adhesive. Place the blocks around your outer circle, nudging them until the seams are tight and the circle looks even. Most wedge-shaped retaining blocks are designed to form a circle, but depending on size you may find a small gap at the end. If so, adjust by slightly rotating or spacing the blocks, or use a smaller block or a trimmed piece to finish the ring. You will usually need about ten to fourteen blocks per course for a standard-sized pit.
A top-down view of the first course sitting on the gravel base.
Seat Each Block Properly
Once the dry fit looks right, work block by block. Set the first block on the gravel, tap it down with the rubber mallet, and check that it is level both side to side and front to back. Then place the second block beside it, press it tight against the first, and level it to match. Check across the gap between blocks as you go, since individual blocks can be level while the ring slowly drifts out of alignment.
Every few blocks, lay your long level across the pit from one side to the other, resting it on blocks that are opposite each other. If the bubble is off, tap the high block down or lift the low one and add a little gravel underneath. This might feel fussy, but it is how pros get rings that look like they were poured in one piece.
Backfill to Lock It In
When the first course is level and tight, fill the gap around the outside with gravel or soil and tamp it firmly. This backfill pushes against the blocks and keeps them from shifting outward under the weight of the courses above. Stay patient here, since a base that is cleanly packed around the ring behaves almost like a solid ring of stone.
9. Stack and Secure the Remaining Courses
With a level first course in place, the rest of the wall goes up quickly. This is the stretch where the pit finally starts to look like a pit, and it is genuinely satisfying. Most backyard pits use two to three courses in total, which lands the finished wall at a comfortable twelve to fourteen inches. More courses are possible, but they raise the wall without improving the fire, and taller walls need more care with stability.
The golden rule of stacking is simple: never let vertical joints line up. Each new block should sit across the seam of the two blocks below it, the way bricks are laid in a garden wall. This staggered pattern spreads the load, ties the courses together, and prevents a single crack from running the full height of the wall. With wedge-shaped blocks in a circle, this usually happens naturally if you start the second course with a block centered over a seam rather than over a block.
Staggered courses with a bead of adhesive between each layer.
Use Adhesive the Right Way
- Dry-fit the next course so you know exactly where each block belongs.
- Run a continuous, quarter-inch bead of outdoor masonry adhesive along the top of the block below, keeping it a little back from the edges.
- Set the new block down gently and press it into place with a slight twist.
- Wipe off any squeeze-out right away with a rag, since it is much harder to remove once dry.
- Check the level and alignment before the adhesive starts to set.
Read the label on your adhesive and confirm it is rated for outdoor masonry use and tolerates heat. Adhesive is there to stop blocks from sliding or being knocked loose, not to take the full structural load, so do not skimp on stacking technique. Many blocks also have built-in lips or pins that lock them to the course below, and these work together with the adhesive to hold everything steady.
Finish With a Cap, If You Want One
A cap course is the flat, smooth top layer that finishes the pit. It gives the wall a clean look, offers a perch for a drink or a plate, and hides any rough tops of the lower blocks. Cap stones are usually cast as flat rectangles or arcs, and they are glued down just like the other courses. If you want a really polished look, choose a cap in a complementary color or a slightly wider profile that overhangs the wall by an inch or so.
Stand back and sight across the top of the pit from a few angles. If a block sits proud, tap it down before the adhesive fully cures. If you notice an obviously uneven spot, fix it now, because after twenty-four hours it will be much harder to adjust.
10. Add the Fire Ring and Fill the Pit Floor
This is the step that protects all your hard work. A fire ring or firebrick liner takes the heat, so your decorative blocks do not have to. Without a liner, concrete blocks are exposed to repeated rounds of intense heating and cooling, which is the fastest route to cracks and crumbling. With a liner, the outer wall stays comfortable to the touch and looks good for years.
The easiest option is a steel fire ring insert. These come in common diameters and typically sit just inside the stone wall with a small gap, usually about an inch. That gap is not a mistake: it lets the metal expand when it heats up without pushing against the blocks. Set the ring inside the wall, check that it is centered, and make sure the top edge sits at or just slightly above the rim of the block wall. If it sits too high, it can look awkward, and if it sits too low, the blocks are exposed to flames.
A cross-section showing wall blocks, steel ring, and fill layer.
Firebrick as an Alternative Liner
If you prefer a more traditional look, line the inside with firebrick, which is made from a dense ceramic material that handles extreme heat. Stack the firebrick in a tight ring, staggering joints just as you did with the blocks, and use a fire-rated mortar or high-temperature adhesive if the manufacturer calls for it. Firebrick takes more patience than a steel insert, but it looks beautiful and holds heat well, which makes the pit feel a little warmer around the edges.
What Goes on the Floor
The floor of the pit should be a layer of fire-safe fill. Lava rock is a popular choice because it is lightweight, porous, and resistant to heat, although it can be a little dusty to handle at first. Crushed gravel or fire glass also work, depending on the look you want. A layer of two to four inches usually does the job. The goal is to keep embers off bare soil, help with drainage, and give the fire a stable bed.
If you want better airflow, you can leave a few small gaps near the bottom of the wall, since fires burn better with oxygen coming from beneath. Some builders drill or leave weep gaps to improve burning and drainage. Keep in mind that more airflow means a livelier fire and more sparks, so adjust to your comfort level and local rules.
11. Add Seating, Lighting, and the Finishing Touches
The pit is built, but a fire pit area is more than the pit itself. The seating, the lighting, the surface underfoot, and the little details around the edges decide whether people actually want to linger. A good setup turns the pit from a feature into a place.
Seating That Works
Arrange chairs in a loose circle with the front edge of each seat about three to four feet from the pit wall. That distance is close enough to feel the warmth and far enough that nobody’s knees are roasting. Adirondack chairs, sturdy outdoor chairs, and log stools are all great choices, and so are built-in stone benches if you want a permanent look. Leave a wide walking gap between the chairs and the pit so people can pass safely, and keep chairs light enough to move when the wind shifts.
A top-down layout: seats at a safe distance, a clear zone, and wood kept back.
Lighting the Space
Warm lighting makes a fire pit area feel like a room under the sky. Path lights along the walkway help guests find their way, and overhead string lights add a cozy glow. Just keep any lights well clear of the fire and its rising heat and sparks, and anchor them to poles or posts rather than trees right above the pit. If you are shopping for options, our guide to the best string lights for your backyard covers weather-ready choices, and the how-to on stringing lights across your backyard walks through the hanging.
The Ground Around the Pit
Lawn grass right next to a pit takes a beating from foot traffic, dropped embers, and heat. Many people surround the pit with pavers, gravel, or decomposed granite, which makes a firm, tidy surface for chairs and keeps grass fires from being a worry. Even if you stick with grass, trim the lawn short and keep a clear apron of bare or non-flammable ground right around the pit.
Your First Fire
Let the adhesive cure for at least twenty-four to forty-eight hours, or whatever the label recommends, before lighting anything. For the first burn, keep the fire small and let it burn down gradually, which helps the materials adjust to the heat. Skip the lighter fluid and gasoline, and use dry kindling, fire starters, and seasoned hardwood. Then sit back, look at the flames you built from a patch of lawn, and enjoy it.
12. Care, Safe Burning Habits, and Fixing Common Problems
A well-built fire pit asks for very little maintenance, but a few habits will keep it looking and working well for years. Most of them come down to common sense: keep it clean, keep it dry, and burn the right stuff.
Burn the Right Fuel
Seasoned hardwood such as oak, maple, hickory, or ash burns hot, steady, and relatively clean. Wood that has been split and dried for at least six months to a year pops less, smokes less, and leaves less creosote behind. Softwoods like pine burn fast and spit sparks, so they are best saved for kindling. Never burn painted, stained, or pressure-treated wood, plywood, trash, or anything with chemical coatings, because the smoke can be toxic and the residue damages the pit.
After Every Fire
- Let it burn down fully rather than smothering it with a big log at the end.
- Drown the embers with water, stir the ashes, and add more water until nothing hisses or steams.
- Feel the ashes with the back of a gloved hand before you walk away, since they can hold heat for many hours.
- Remove cold ashes regularly, because built-up ash holds moisture and can speed up rust in the ring.
- Use a cover when the pit is not in use, which keeps rain, leaves, and critters out.
Seasonal Upkeep
Once or twice a year, look the pit over. Check for loose blocks, cracked caps, or a ring that has started to rust through. Rust on a steel ring is cosmetic at first, but a thin or warped ring should be replaced. Re-glue any loose blocks, sweep out debris, and refresh the fill if it has crumbled. In cold climates, make sure the pit is not holding standing water going into winter, since freezing water is the most common cause of cracks in masonry.
Troubleshooting Table
| Problem | Likely Cause | What to Do |
|---|---|---|
| Wall is leaning or shifting | Base not compacted or poor drainage | Rebuild the affected section on a firmer, deeper gravel base |
| Blocks crack near the flame | No liner or direct heat on concrete | Add a steel ring or firebrick liner and replace cracked blocks |
| Water pools in the pit | Weak drainage | Add gravel, create a drainage path, and use a cover |
| Heavy smoke | Damp or unseasoned wood | Switch to dry hardwood and add some airflow |
| Rust on the ring | Moisture and ash buildup | Clean it out, wire-brush, and consider high-heat paint or a replacement |
| Adhesive squeezed out and hardened | Too much applied | Scrape with a putty knife or chisel; use less next time |
Safety Habits Worth Repeating
Always check the weather and wind before lighting a fire, and skip it entirely on breezy or very dry days. Keep kids and pets at a respectful distance, and teach everyone the basic rules, including where the water is and what to do if sparks land somewhere unexpected. Never use accelerants, and never leave the fire unattended. If your area issues burn bans, honor them without exception, even if the day looks calm.
If you would rather enjoy birds than flames on certain days, or you want to pair your new gathering spot with other backyard upgrades, the cards at the end of this guide point to a few of our favorite follow-up reads. A fire pit is a great anchor for a yard that is built for living in.
Frequently Asked Questions About Building a Fire Pit
How deep should I dig for a backyard fire pit?
Most DIY pits need a dig of about six to eight inches below the surrounding grade. That leaves room for four to six inches of compacted gravel and for the first course of blocks to sit securely. In cold climates with deep frost, digging a bit deeper and adding more gravel helps the base resist heaving.
How far should a fire pit be from the house?
Local rules vary, but a common range is ten to twenty-five feet from the house, deck, fences, and other structures. Always confirm your specific distance with your city, county, or fire department, and keep the area above the pit clear of branches, roofs, and power lines.
What kind of blocks are safe for a fire pit?
Cast concrete retaining wall blocks are the usual choice for the outer wall, as long as a steel ring or firebrick liner protects them from direct flames. Avoid river rock, wet stone, and hollow or very porous materials near the fire, since trapped moisture can cause cracking or popping when heated.
Do I need a permit to build a fire pit?
It depends on where you live. Some areas require a permit or inspection, particularly for permanent or gas-fueled pits, while others have no requirement at all. Check with your local building or fire department, and review your HOA rules if you have one, before you start.
Can I build a fire pit directly on grass?
It is not a good idea. Without a proper base, the pit will settle unevenly, and the heat can scorch the lawn or ignite dry grass around it. Remove the sod, dig down, and build on compacted gravel, and keep a clear, non-flammable zone around the finished pit.
How big should a backyard fire pit be?
Most homeowners choose an interior diameter between thirty-six and forty-four inches. That size supports a satisfying fire without being wasteful, and it lets everyone sit close enough to feel the warmth. The wall usually stands twelve to fourteen inches tall for comfortable seating.
Should I use a steel ring or firebrick as a liner?
Both work well. A steel ring is faster and easier for beginners, and it drops in as a single piece. Firebrick takes more effort to install but looks traditional and tolerates intense heat very well. Either one is far better than no liner at all.
What do you put on the bottom of a fire pit?
A layer of two to four inches of lava rock, crushed gravel, or similar fire-safe fill is common. It protects the soil, improves drainage, and gives the fire a stable bed. Avoid damp river rock, which can crack or pop under heat.
How long does it take to build a fire pit?
Most people finish a standard block pit in a weekend. Marking, digging, and compacting the base usually fills the first day, and stacking, gluing, and finishing takes the second. Then give the adhesive at least a day or two to cure before the first fire.
How much does it cost to build a fire pit?
A basic DIY pit with standard blocks, gravel, a steel ring, adhesive, and fill often costs a few hundred dollars. Natural stone, custom caps, built-in seating, and professional installation can raise the price substantially. Shopping around for blocks and renting a compactor instead of buying one keeps costs down.
Can I build a fire pit on a patio or deck?
A permanent masonry pit does not belong on a wooden deck, and it needs a non-combustible, stable surface such as concrete or pavers set on a solid base. If you have a deck, a freestanding fire pit designed for decks, used with a heat shield and extra caution, is the safer route. Always follow manufacturer and local guidelines.
What wood is best to burn, and what should I avoid?
Dry, seasoned hardwoods like oak, maple, and hickory burn hot and clean. Avoid painted, stained, or treated wood, plywood, and household trash, since they release harmful chemicals and damage the pit. Keep firewood stored away from the fire and off the ground.
Conclusion: Your Backyard, Upgraded
Building a fire pit is one of those projects that sounds bigger than it is. Once you break it down, it is a series of simple, learnable steps: check the rules, choose the right spot, mark a circle, dig, build a compacted gravel base, stack your blocks, add a liner, and finish with seating that invites people to stay. None of those stages requires special talent, only patience and a willingness to do the prep work properly.
The payoff lasts far longer than the weekend of effort. A well-built pit gives your family a reason to be outside, a place for friends to gather, and a source of simple, unhurried evenings you will remember. Take your time with the base and the first course, respect the safety basics, and burn good wood. Do those three things and your fire pit should serve you well for many seasons to come.
If you are still weighing whether to build or buy, our guide to the best fire pit for your backyard is a great next stop, and if your local rules are still a question mark, this breakdown of fire pit rules can help you sort it out before you dig.
As an Amazon Associate, we earn from qualifying purchases. If you click an Amazon link on this page and buy something, we may receive a small commission at no extra cost to you. Always follow your local fire regulations and the manufacturer instructions for any product you use.